How to Install Google Tag Manager on Your Website
These are text instructions for installing Google Tag Manger on your website as well as video and text instructions for making sure it’s installed correctly.
Google Tag Manager is an easy, efficient way to add and manage code on your website. You can place the GTM code once on all of the pages on your website, and then we can use the GTM interface to add and update most tracking codes without bothering you.
Your StubGroup Client Success Manager will email your Google Tag Manager code to you.
These instructions are specific to StubGroup Advertising clients. If you’re not a StubGroup client, you can adapt the instructions to fit your scenario. Better yet, click here to see why you should become a StubGroup client!
Install Google Tag Manager on a Non WordPress Website
Infographic
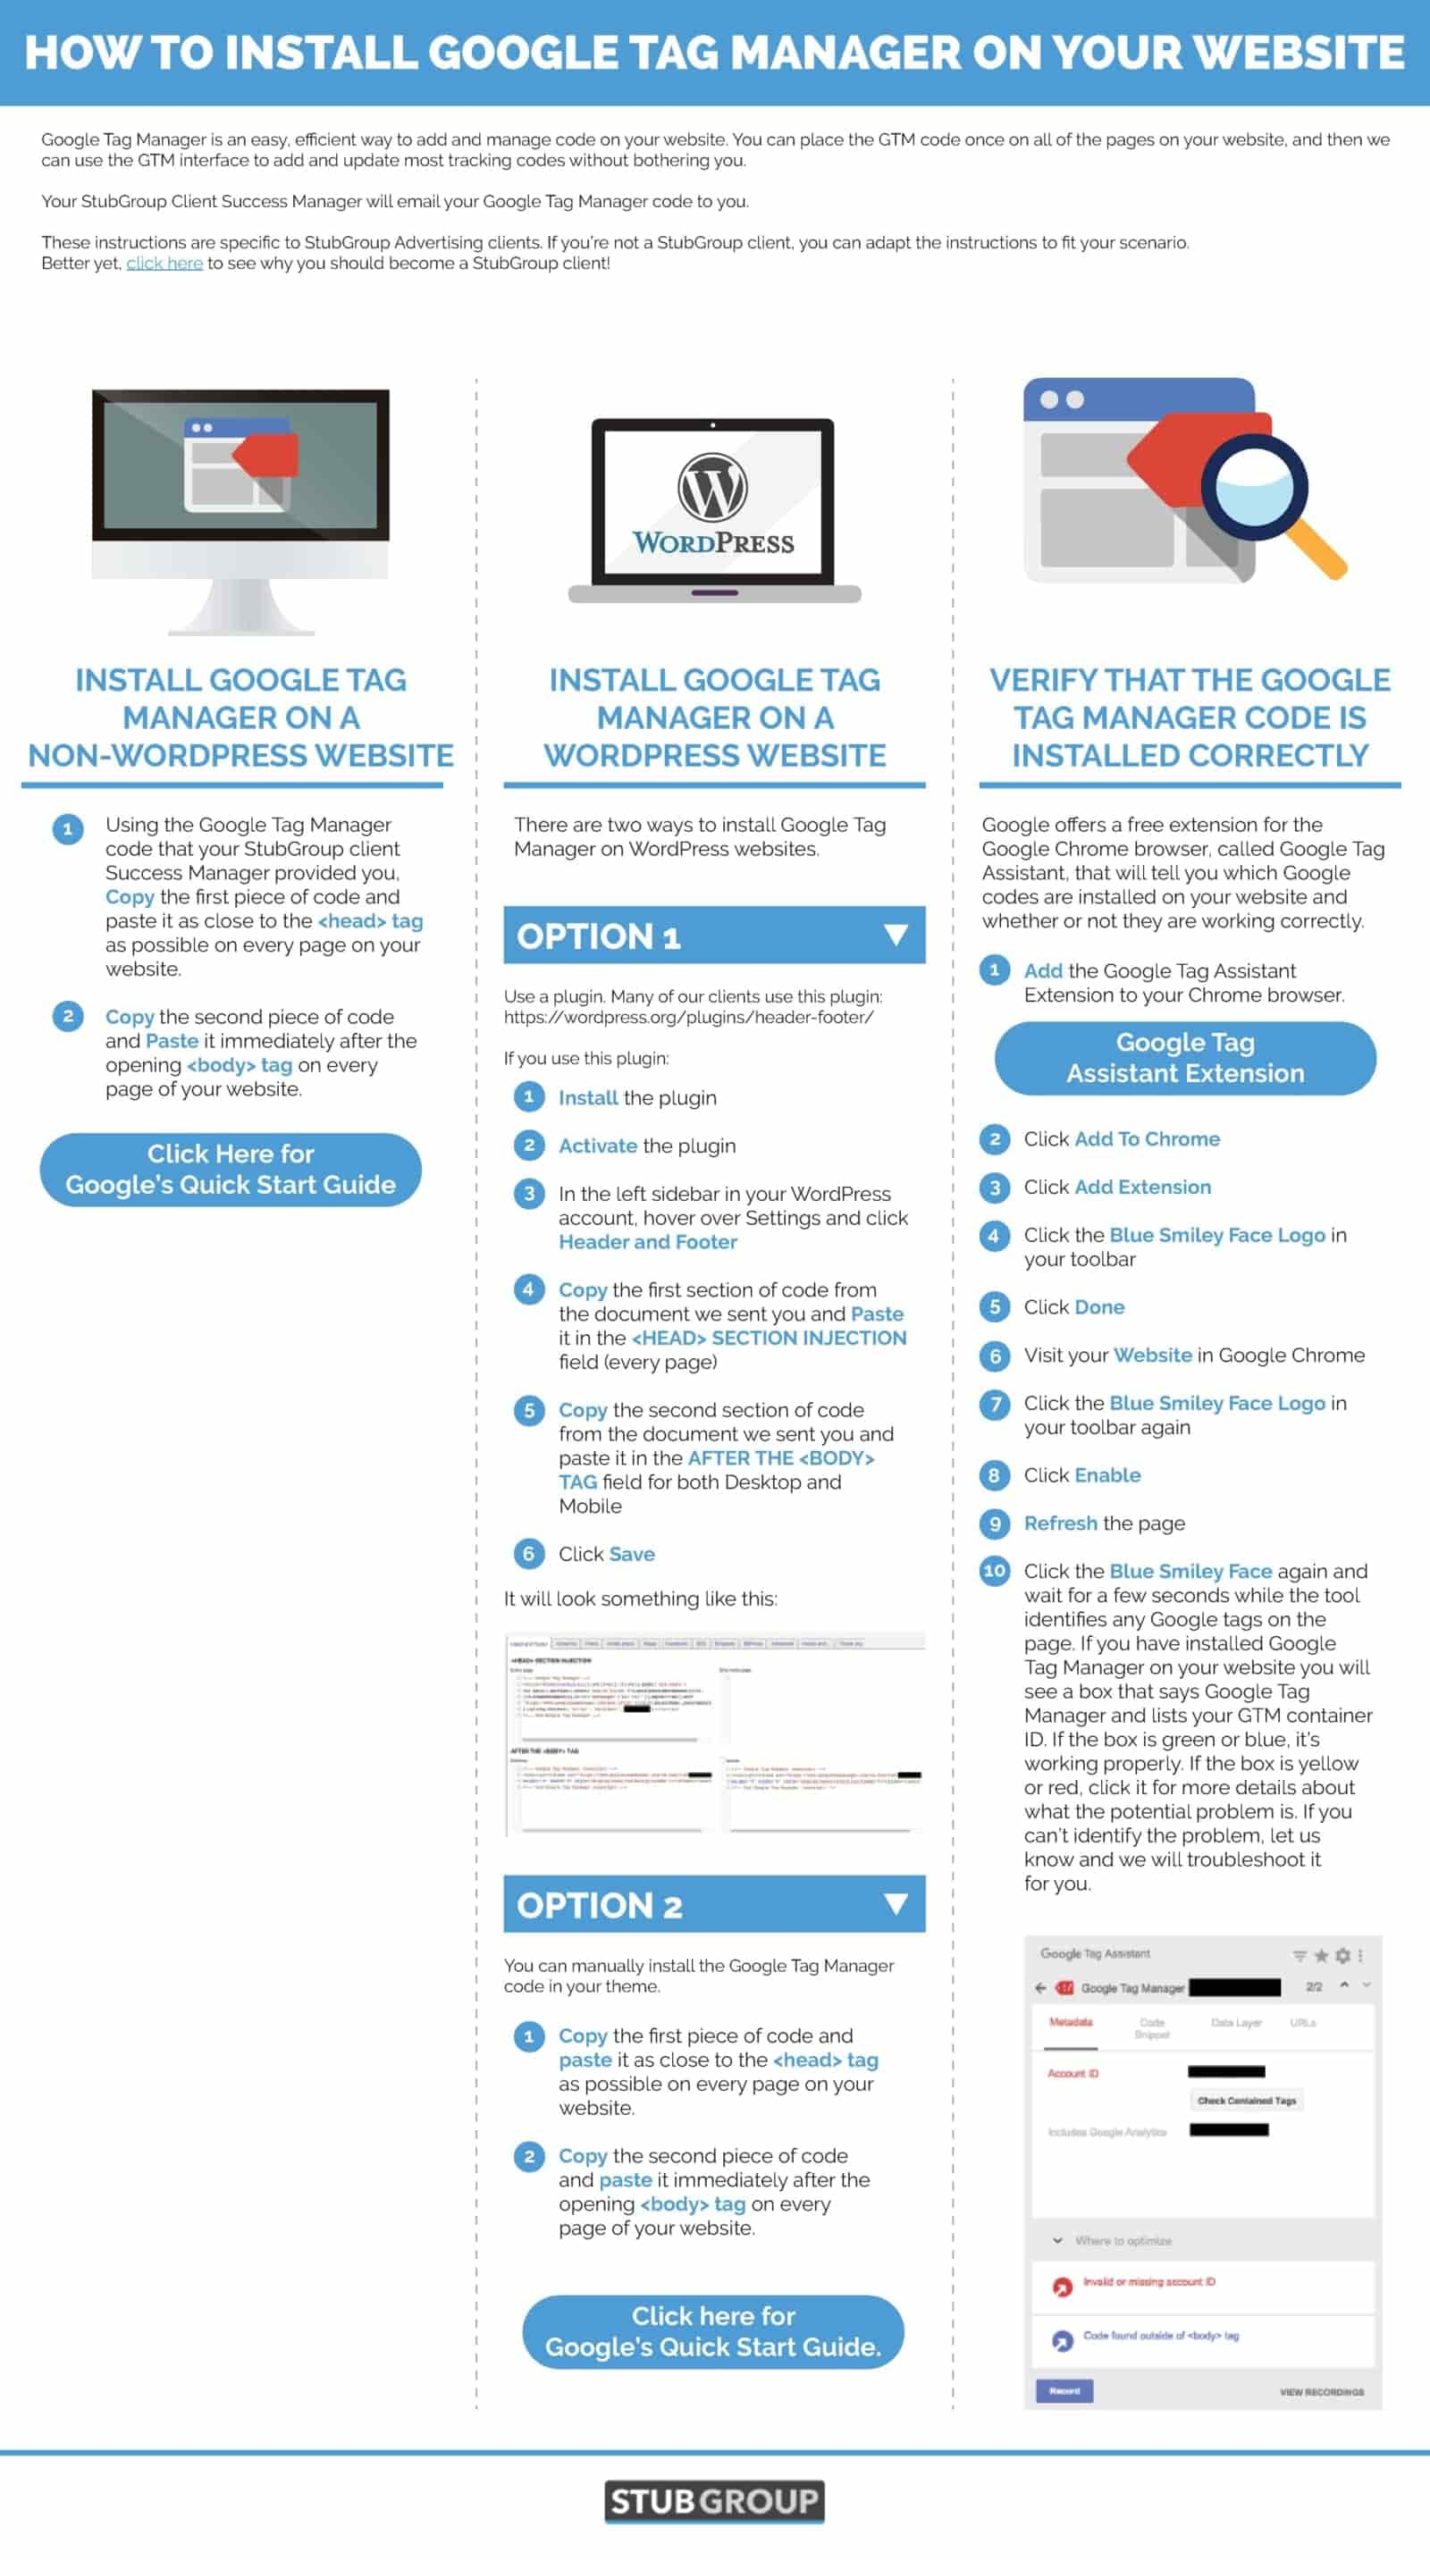
1. Copy the first piece of code and paste it as close to the tag as possible on every page on your website.
2. Copy the second piece of code and paste it immediately after the opening tag on every page of your website.
Click here for Google’s Quick Start Guide.
Install Google Tag Manager on a WordPress Website
There are two ways to install Google Tag Manager on WordPress.
Option 1: Use a plugin. Many of our clients use this plugin: https://wordpress.org/plugins/header-footer/
If you use this plugin:
- Install the plugin
- Activate the plugin
- In the left sidebar in your WordPress account, hover over Settings and click Header and Footer
- Copy the first section of code from the document we sent you and paste it in the SECTION INJECTION field (every page)
- Copy the second section of code from the document we sent you and paste it in the AFTER THETAG field for both Desktop and Mobile
- Click save
It will look something like this:

Option 2: You can manually install the Google Tag Manger code in your theme.
1. Copy the first piece of code and paste it as close to the tag as possible on every page on your website.
2. Copy the second piece of code and paste it immediately after the opening tag on every page of your website.
Click here for Google’s Quick Start Guide.
Verify that the Google Tag Manager Code Is Installed Correctly
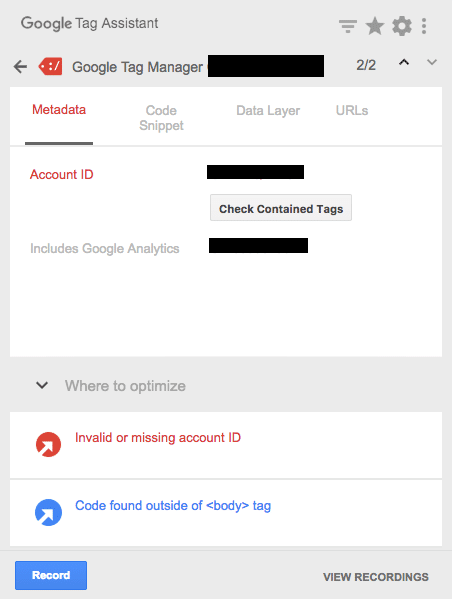
Google offers a free extension for the Google Chrome browser, called Google Tag Assistant, which will tell you what Google codes are installed on your website and if they are working.
- Add the Google Tag Assistant extension to your Google Chrome browser here: https://chrome.google.com/webstore/detail/tag-assistant-by-google/kejbdjndbnbjgmefkgdddjlbokphdefk?hl=en
- Click ADD TO CHROME
- Click Add extension
- Click the blue smiley face logo in your toolbar
- Click Done
- Visit your website in Google Chrome
- Click the blue smiley face logo in your toolbar again
- Click Enable
- Refresh the page
- Click the blue smiley face again and wait for a few seconds while the tool identifies any Google tags on the page. If you have installed Google Tag Manager on your website you will see a box that says Google Tag Manager and lists your GTM container ID. If the box is green or blue, it’s working properly. If the box is yellow or red, click it for more details about what the potential problem is. If you can’t identify the problem, let us know and we will troubleshoot it for you.
NOTE: There’s a temporary bug in Google Tag Assistant that triggers the error message “Invalid or missing account ID” shown in the picture below. Google is fixing the bug. If you see that error message, don’t worry, because it’s not actually an error.